Add New User
Created: 2023-02-09 16:17:19 -0700 Modified: 2023-02-13 15:22:07 -0700
Information Required
- Full Name
- Private email - to send credentials
- Employment role (Architect, Admin, etc)
- Software needed (determines licensing, access, installations)
Create the user account in ActiveDirectory
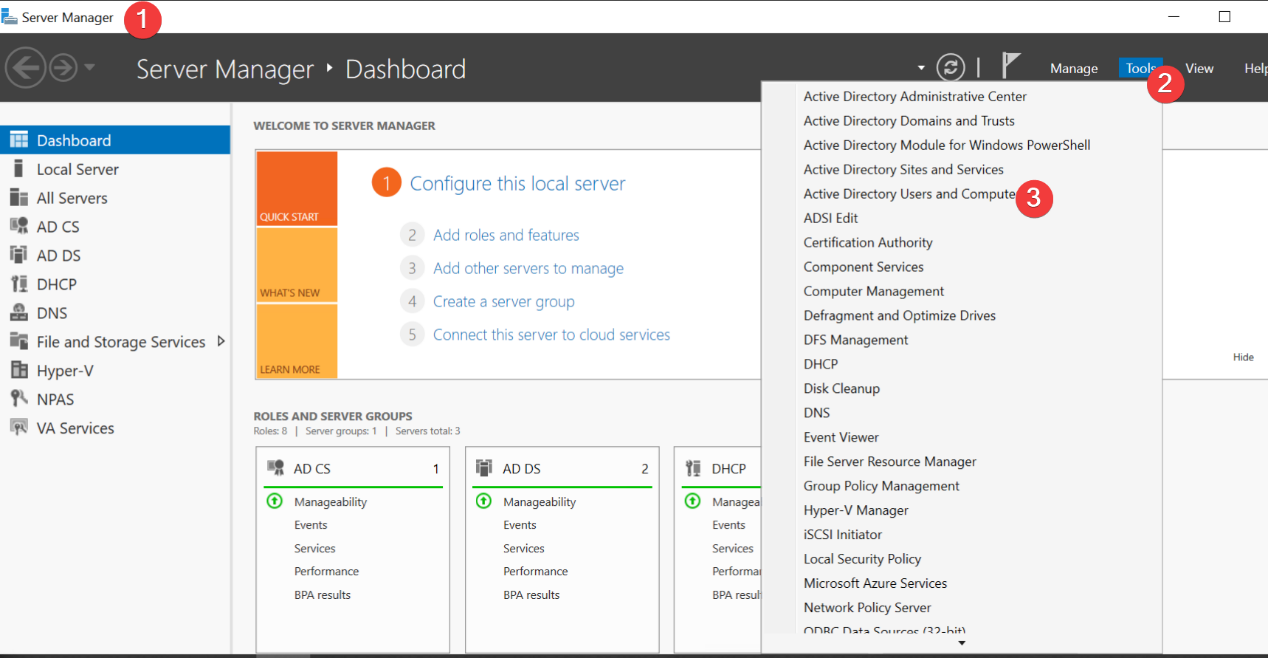
- Login to PDC as Administrator with Remote Desktop
- From the Server Manager, select Tools-> Active Directory Users and Computers
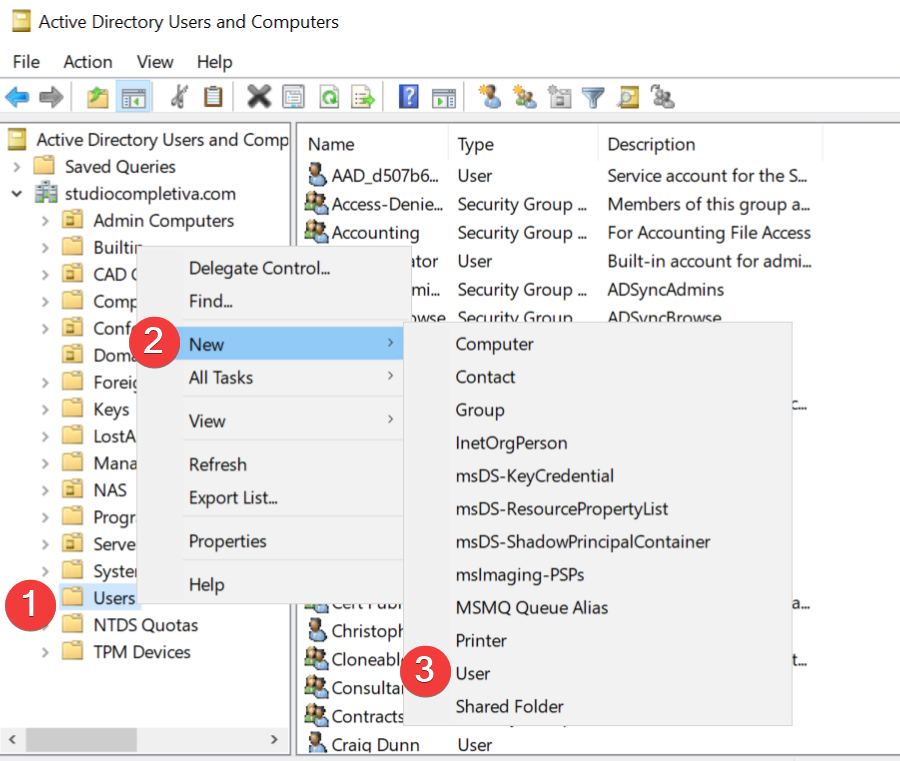
- Navigate to Active directory|Studiocompletiva.com|Users
- Right-click on Users, and Click on New|User
-
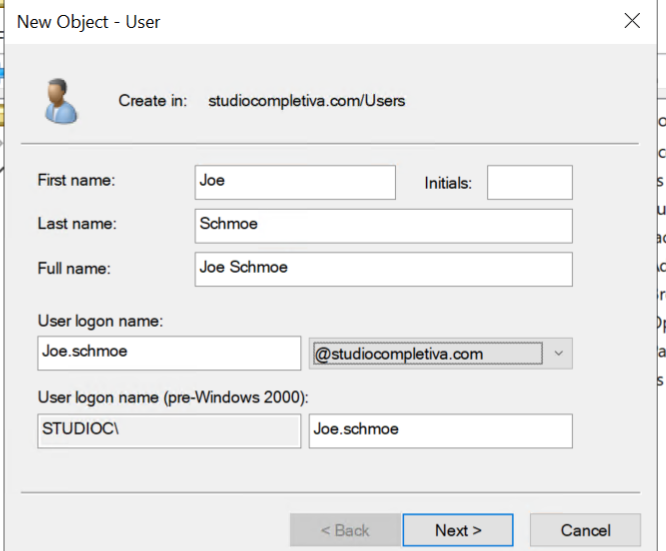
Fill out the New User form and include First and Last name a. User logon name is
first.lastb. Pre-Windows 2000 is the same -
Click
Next
-
Give the User a Password and uncheck "user must change password at next logon"
We will need access to their system prior to them joining
-
Double-click on the new user in the list of users and fill out the following information
a. Member Of (Group memberships)
| UserType | Group | Description |
|---|---|---|
| All | Domain Users | Default domain group - REQUIRED |
| Architect | Architecture | Controls access to PROJECTS folder and other architectural resources |
| Employee | Local Administrators | Allows users with studioc computers to manage installations themselves. |
| HR/Business office | Accounting | Access to sensitive folders on NAS |
b. Attribute Editor: Find ProxyAddresses Attribute in the list and double-click to change the value
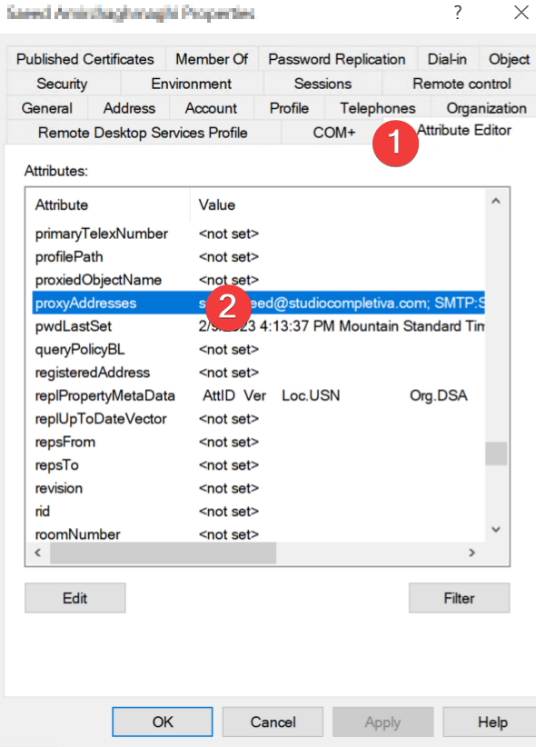
c. Set primary email address for 365:
SMTP:<first>.<last>@studiocompletiva.com
d. Add a secondary email address for 365:
smtp:<email alias>@studiocompletiva.com (optional)

- Apply Changes and close
Sync to Azure using the Synchronization Service Manager
- Open Synchronization Service Manager

- Go to
Actions|Run - Choose the studiocompletiva.com Connector from the list
- Select 'Export' for the run profile
- Confirm the Export was a success
Assign Microsoft 365 License from portal
- Login to portal.office.com with an Administrator account
- Go to the Admin App
- Click on Users | Active Users
- Find the new user account
- Click on the account
- On right user panel, click on Licenses and apps

- Choose the appropriate available licenses for the new user.
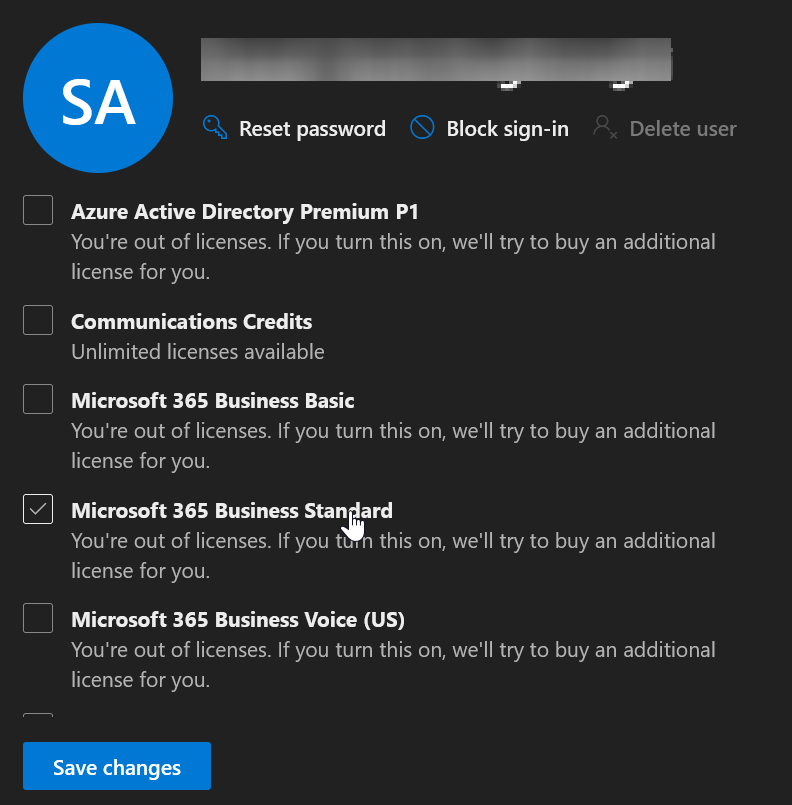
| MS 365 Business Basic | Email and teams only |
|---|---|
| MS 365 Business Standard | Full office suite + email |
Other licenses
| MS 365 Business Voice | Phone service |
|---|---|
| MS Power Automate Free | Why not?? |
It may take 20 minutes or so for the new account exchange email account to be setup automatically
SETUP NETWORK SHARES
| Drive letter | Location | Notes |
|---|---|---|
| G: | 10.0.0.250StudioC | Autogenerated through GPO |
| S: | 10.0.0.250StudioCSCANS | Autogenerated through GPO |
| H: | 10.0.0.250Homes |
Manually created on workstation |
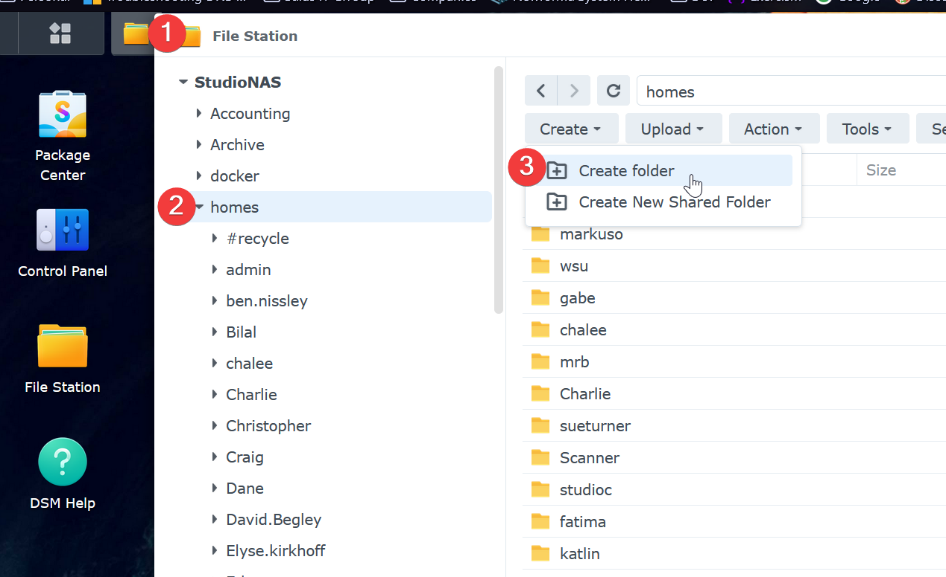
- Login to the NAS and open File Station
- Navigate to Homes and create the user's folder
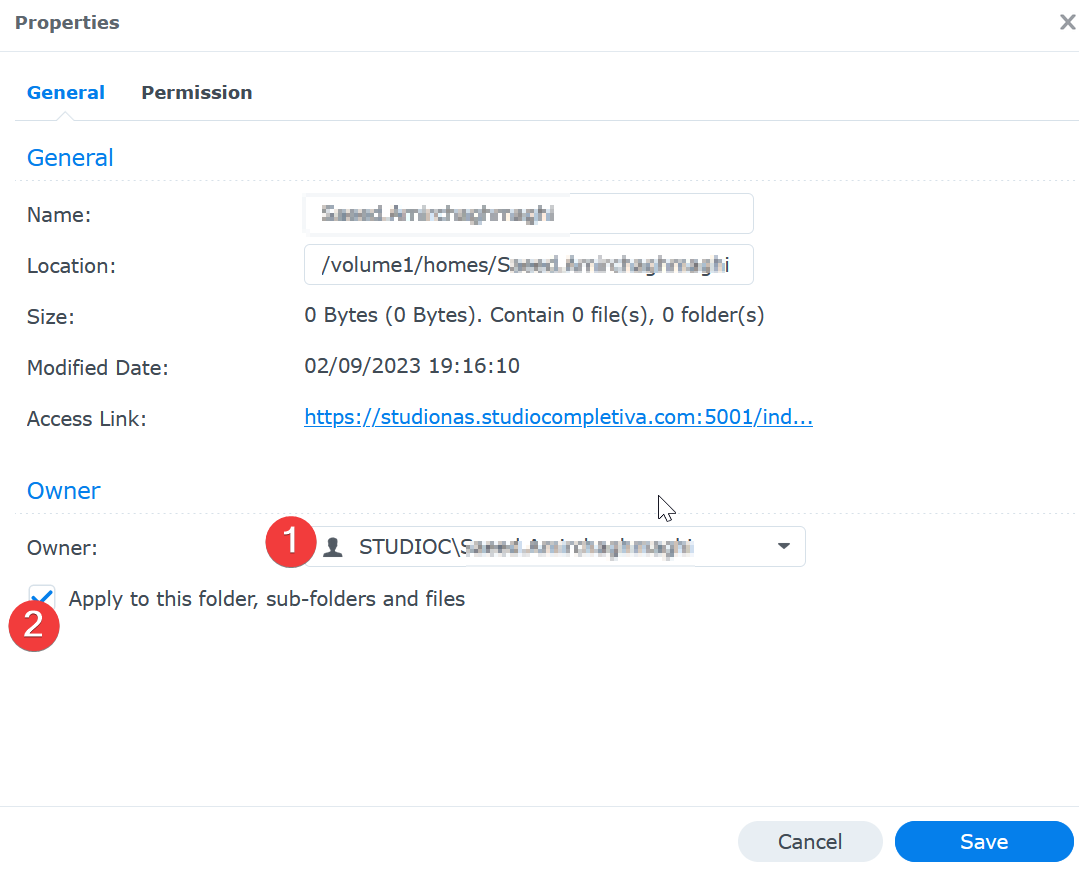
- Right-click on the new user folder and click on Properties
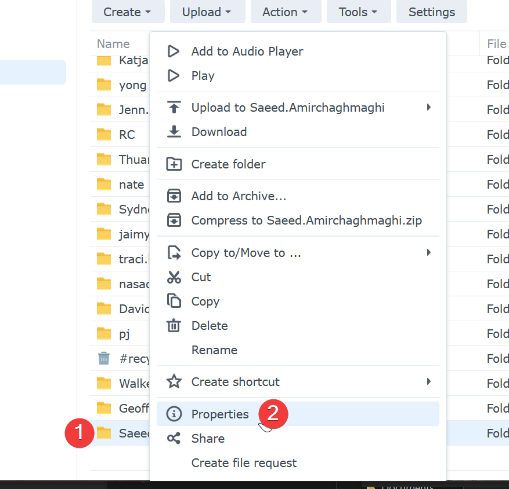
- Change the owner of the folder to the new user account. Apply changes to this folder, subfolders, and files.
- Click on the Permission tab
-
Click Create and Add the new user account, apply to all, and set the permissions as follows:
a. Uncheck Administration b. Check READ c. Check WRITE
-
Click Done
-
Back on the previous menu, check "Apply to this folder, sub-folders, and files"
- Click Save
-
On the user Workstation, Create the H: Mapped drive to the new user's folder
-
Next, Create a folder for new User to store SCANS
a. On the NAS Console, Go to File Station b. Navigate to
StudioC\SCANSfolder c. Add new user's folder -
Right-click on the new user folder and click Properties
- Change the owner to "Scanner" -- the local account, not the domain account
- Check the "Apply to this folder, sub-folders and files"
-
Save changes
-
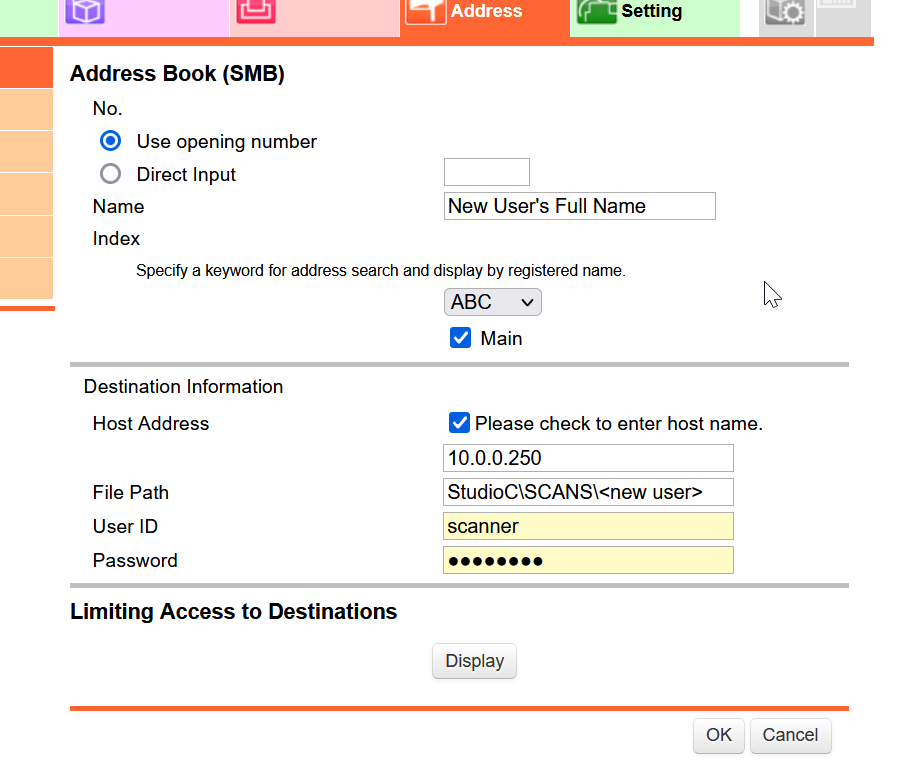
Add the user to the MF Printer Contacts (Konica Minolta)
a. Login to the printer interface: http://10.0.0.136 b. Click on the Store Address tab c. Click the New Registration Button
-
Choose SMB and click OK
-
Enter the Name of the user
- Select the Keyword for address search -- ABC, DEF, etc -- base it on the user's last name (ex: Applewood would go in ABC)
- Check the Main Checkbox
- Check the "please check to enter host name"
- Enter the NAS IP Address: 10.0.0.250
- File Path is StudioCSCANS
- User ID is 'scanner'
- Password - in keeper
- Click OK to save
SETUP MICROSOFT 365 USER AND DOWNLOAD OFFICE (IF APPLICABLE)
- After logging into the new user's workstation, open a browser
- Login to https://portal.office.com as the new user
- Go through the MFA setup and in the Phone setup, use your own cell phone number
We change that after the setup is completed.
- Once you are successfully logged in to the portal, if the user is licensed with MS OFFICE STANDARD and the workstation does not have Office installed, download the installer for 64-Bit Office
a. Click HOME in the portal
On the right side, there are installation options based on their license.
- Click on Other Install Options

- Click on Apps and Devices, then choose Office, 64-Bit and Install Office

- Run the downloaded installer
- Once complete, Proceed to setting up Outlook
SETUP OUTLOOK AND TEAMS ON WORKSTATION
- Login to the new user's workstation
- Launch Outlook
- Confirm the user's email address is in the box
- When authenticating, let the account be system-wide and not just for Outlook
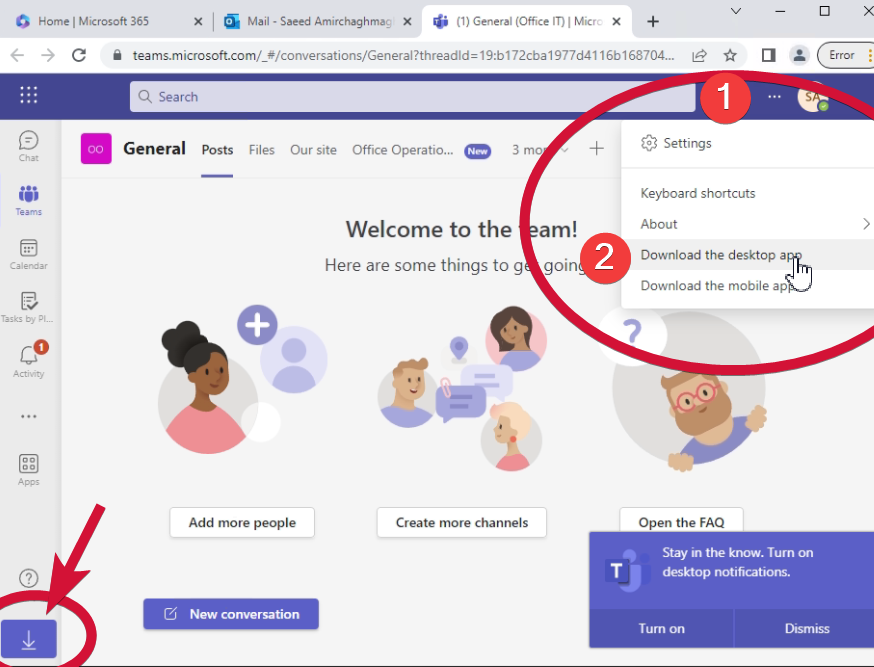
Teams installation
NOTE: sometimes this is installed automatically with Office or shortly afterwards, we will assume it is not
- While logged into the portal as the user, go to the TEAMS app (https://teams.microsoft.com)
- Download the Desktop App from either the '...' menu or the bottom left of the navigation