NewForma User Setup
Created: 2023-02-10 16:37:00 -0700 Modified: 2023-02-13 14:51:39 -0700
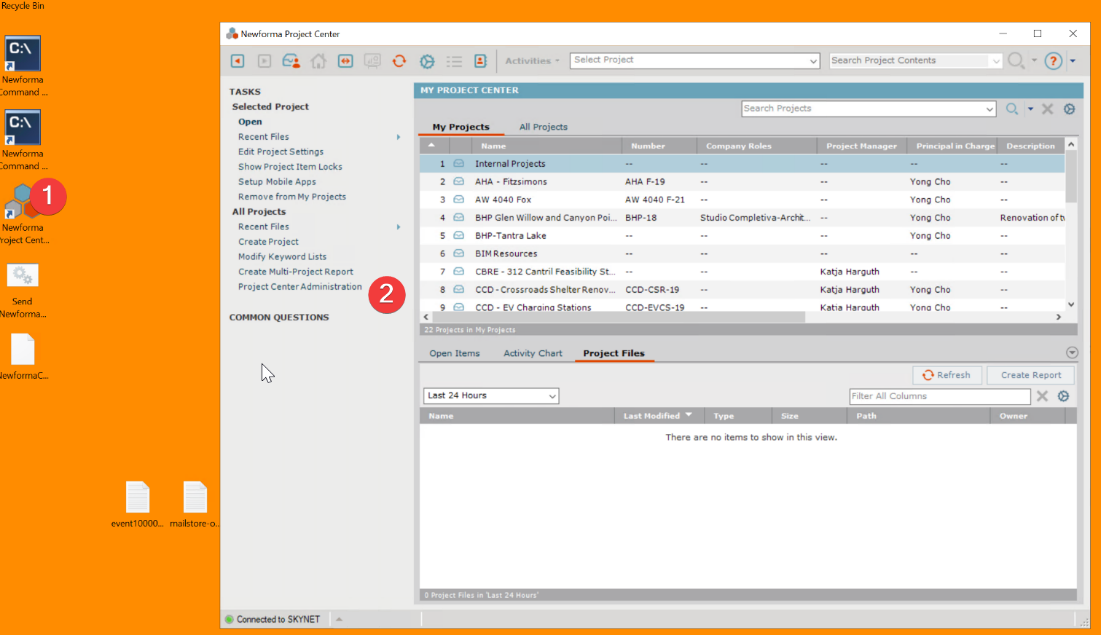
Setup the User with a license on the Newforma Project Center Server
a. On the Newforma Project Center Server, NPCS, Skynet, open Newforma Project Center
b. In the Task pane, click on Project Center Administration
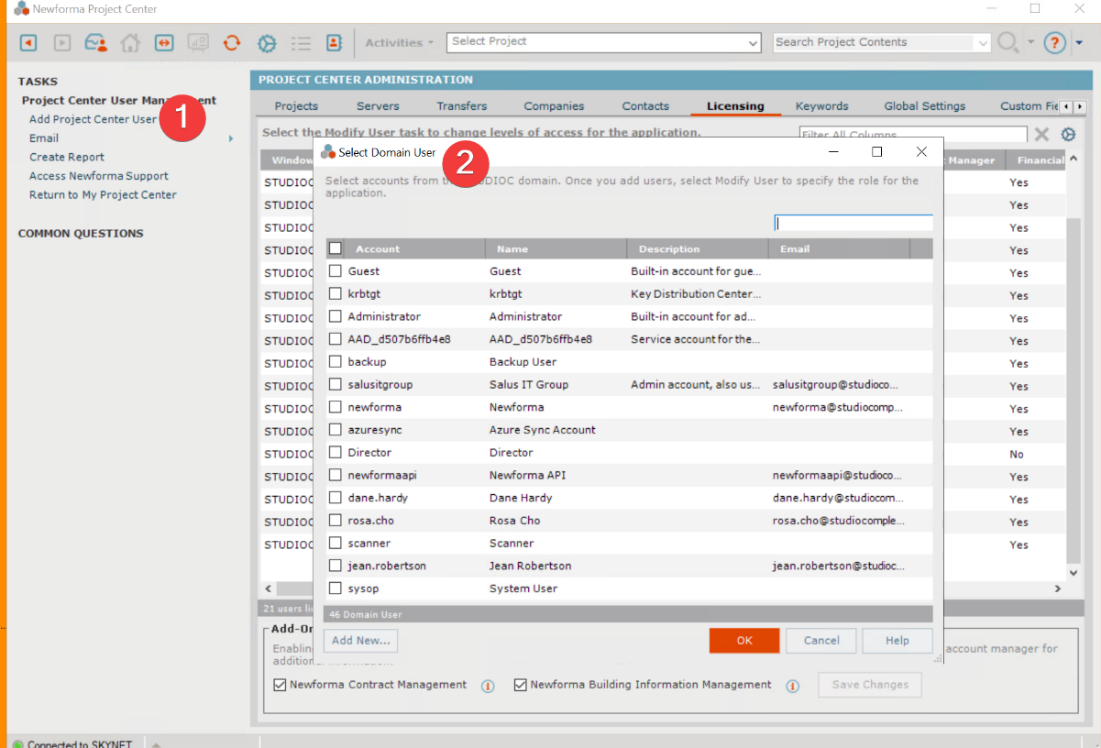
d. Click on the Licensing tab
e. Select the new user account either by scrolling to it or by searching for the username
a. Select the roles of the new user account
This is usually going to be "Professional User" and "Document Controller"
b. Link the new user with a Contact -
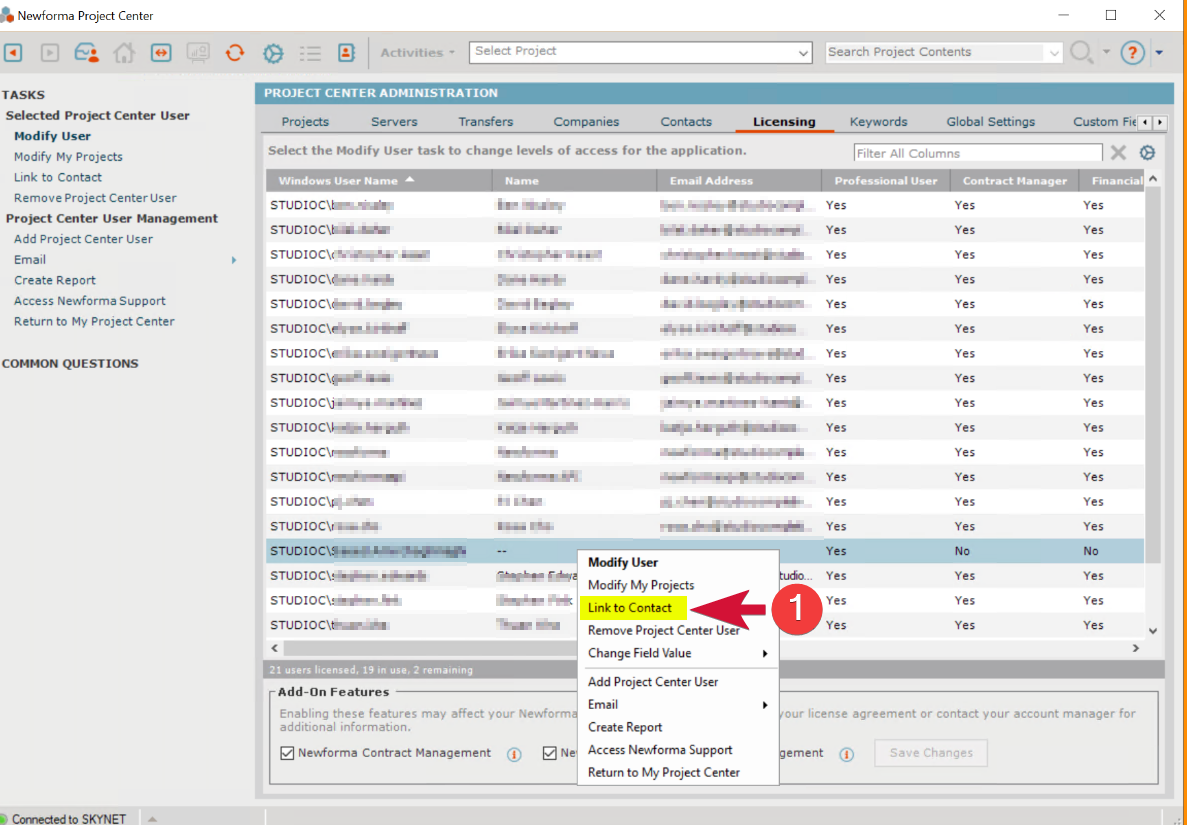
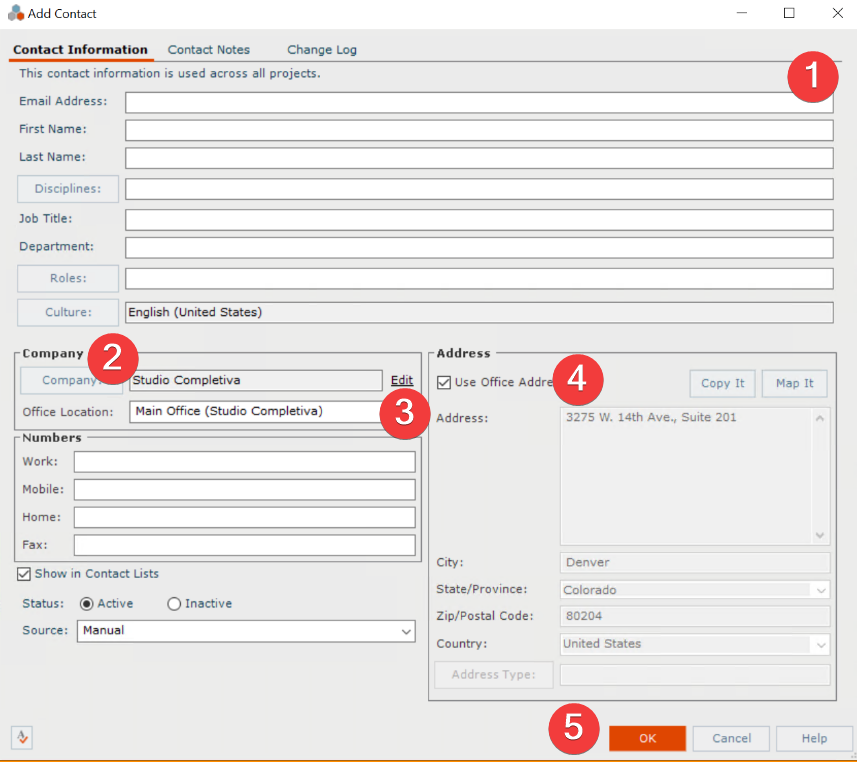
This will usually mean you need to create the contact. Click on New Contact and fill out the form.
i. Fill out the email, first, last, disciplines (architect(ure)), and Roles (Architect)
ii. Click on the company button and select Studio Completiva
iii. Click on the Office location and choose Main Office
iv. Check the Use Office Address (autofills)
v. Click OK to Save
a. In the Licenses tab, confirm new user is associated.
-
Install the Newforma Project Center Client on the user's Workstation
a. Close Outlook, if open b. Install the latest client from "studionasStudiocITSoftwareNew Forma"
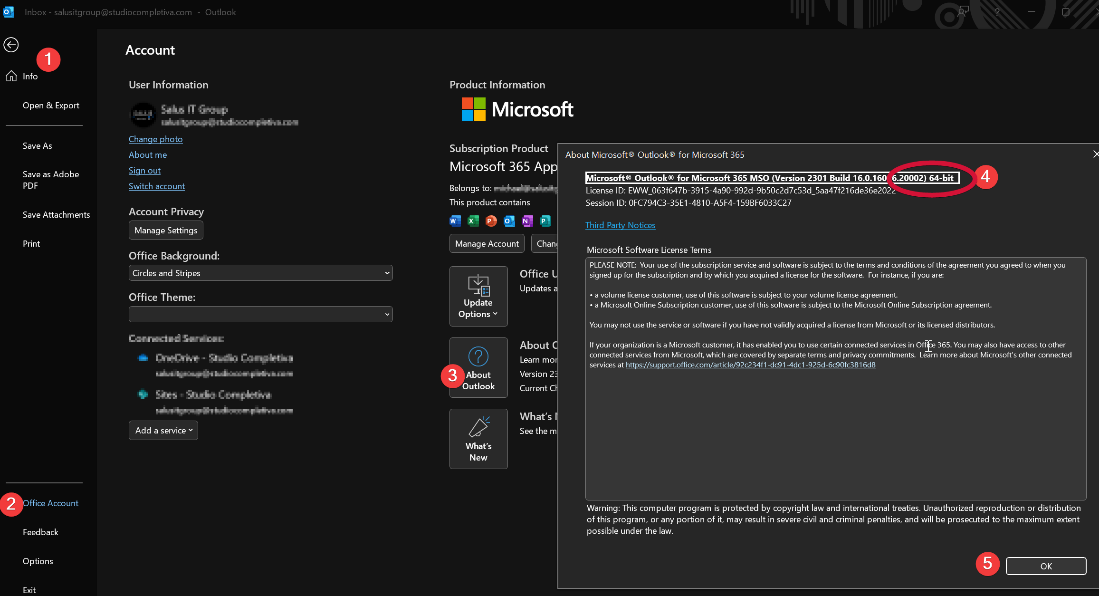
Match the Office Installation Architecture (64-bit or 32-bit) - Check workstation's office
 c. During the installation wizard, when prompted, enter the Newforma Project Center Server FQDN
Skynet.studiocompletiva.com
d. Launch Newforma Project Center
e. Open Outlook to install the Newforma Plugin. You should see a Newforma Section in the menu